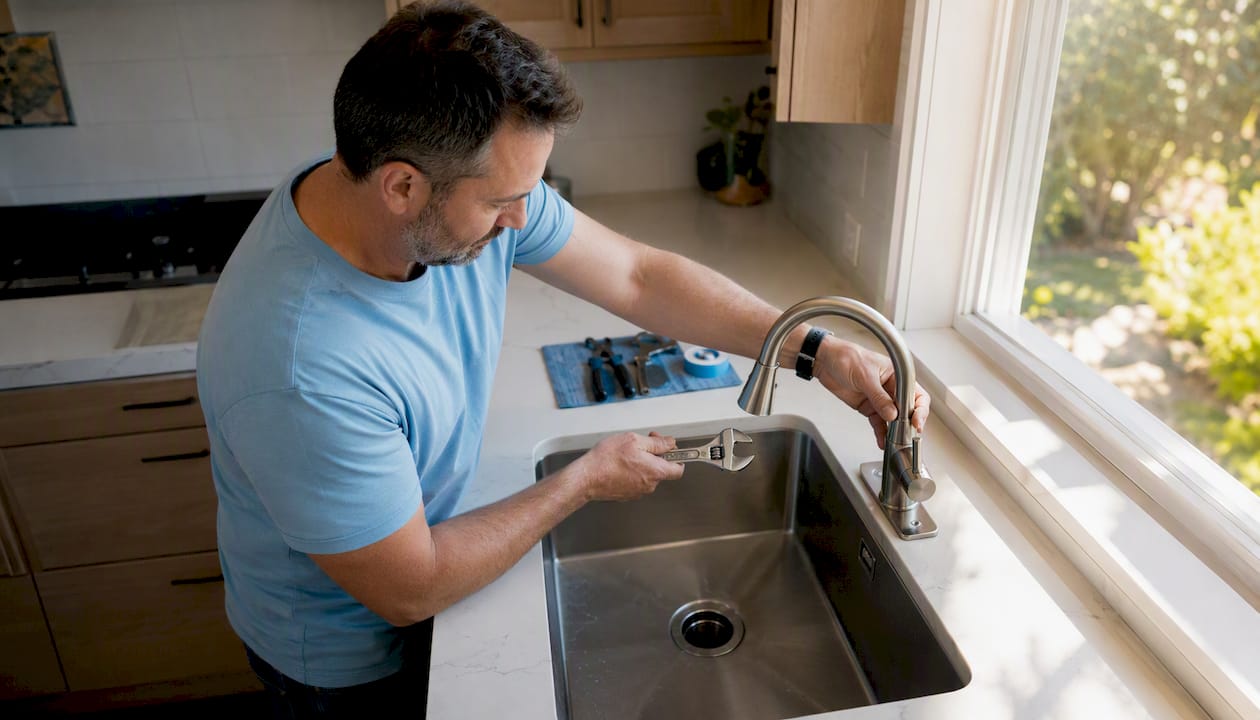
TL;DR:
- Most household plumbing tasks are simple small repairs or drain cleanings, but system-level work requires a licensed plumber. Knowing how to shut off water, use mechanical tools, and check permit rules helps prevent water waste and costly damage. Routine maintenance and timely repairs protect homes and save money by avoiding major emergencies.
Most plumbing tasks fall into two clear categories: small parts swaps and basic drain clearing that a confident homeowner can handle in under an hour, and system-level work involving gas, main lines, water heaters, or wall openings that requires a licensed plumber and often a permit. That’s the bottom line. A single faucet dripping once per second can waste roughly 3,000 gallons of water a year, and a running toilet can waste up to 200 gallons per day — so even the small stuff deserves prompt attention.
Three actions every homeowner should know before anything else:
- Know your main shutoff. Find it now, before an emergency. It’s typically near the water meter or where the supply line enters the house.
- Use mechanical methods first. Reach for a plunger or drain snake before any chemical cleaner, especially on older pipes.
- Check local permit rules. Any work that opens walls, moves supply or drain lines, or replaces a water heater usually requires a permit from your local building department. The EPA’s WaterSense program is a reliable starting point for water-efficiency guidance.
Pro Tip: Before starting any household plumbing repair, photograph the existing setup. Those photos protect you at resale and support any insurance claim tied to water damage.
Table of Contents
- What are the most common plumbing tasks homeowners face?
- How to fix a leaky faucet: causes, steps, and cost
- How do you safely unclog a sink or shower drain?
- How do you fix a running toilet or a clogged toilet?
- Replacing a showerhead or faucet: quick swaps and what to check first
- Garbage disposal safety: how to clear a jam and reset the unit
- Water heater maintenance: what you can do and when to call for replacement
- What to do when a pipe bursts or a major leak starts
- When does U.S. law or practical risk require a licensed plumber?
- How do you detect hidden leaks behind walls or under floors?
- Key Takeaways
- Why routine maintenance is the most underrated plumbing decision you’ll make
- Psvplumbinginc is ready when the job calls for a licensed pro
- Useful sources and further reading
What are the most common plumbing tasks homeowners face?
The ten jobs below cover the vast majority of household plumbing repairs and maintenance calls. Use this table as a quick reference before diving into the step-by-step sections.
| Task | Typical DIY Time | Difficulty | DIY or Pro? |
|---|---|---|---|
| Fix a leaky faucet | short time | Easy | DIY |
| Unclog sink/shower drain | short time | Easy | DIY |
| Unclog toilet | short time | Easy | DIY |
| Replace showerhead/faucet | short time | Easy | DIY |
| Garbage disposal reset/jam | moderate time | Easy–Moderate | DIY |
| P-trap cleaning | moderate time | Easy | DIY |
| Water heater flush/anode rod | moderate time | Moderate | DIY (maintenance); Pro (replacement) |
| Shutoff valve locate/small pipe leak | moderate time | Moderate | DIY (temporary); Pro (repair) |
| Main sewer line issues | N/A | Advanced | Pro only |
| Seasonal/preventive checks | short time | Easy | DIY |
Routine monthly checks take a short amount of time and can prevent the kind of damage that turns a small repair into a costly water-damage claim.
Permit flags: Water heater replacement, new rough-ins, and any work that moves supply or drain lines typically requires a permit in most U.S. jurisdictions. Like-for-like fixture swaps generally do not — but confirm with your local building department before you start.
How to fix a leaky faucet: causes, steps, and cost
Most faucet leaks trace back to a worn washer, a degraded O-ring, or a failing cartridge. The fix is usually inexpensive and takes under 90 minutes.
What you’ll need: adjustable wrench, flathead and Phillips screwdrivers, replacement washers or cartridge (match your faucet brand), plumber’s grease, and a small bucket.
Estimated cost: $5–$60 for parts only. Time: 30–90 minutes.
- Shut off the water supply at the fixture’s shutoff valve under the sink, or at the main if there’s no local valve.
- Remove the handle. Pry off the decorative cap, unscrew the handle screw, and lift the handle free.
- Inspect the cartridge or washer. On compression faucets, look for a worn rubber washer at the stem base. On cartridge faucets, pull the cartridge and check for cracks or mineral buildup.
- Replace the worn part. Swap in the new washer or cartridge, apply a thin coat of plumber’s grease to O-rings before reassembly.
- Reassemble and test. Turn the supply back on slowly and check for drips at the base and spout.
When to call a pro:
- The leak persists after replacing parts.
- You see corrosion on the valve seat or supply lines.
- Water stains appear inside the cabinet wall, suggesting a leak behind the wall.
- The shutoff valve itself won’t close fully.
For a broader look at repair costs before you start, the homeowner’s budgeting guide from Psvplumbinginc walks through what to expect on common jobs.
How do you safely unclog a sink or shower drain?
Start with the least invasive method and escalate only if it fails. Chemical drain cleaners are a last resort — professional plumbers advise against them on older pipes because caustic formulas weaken pipe walls and create hazards for anyone who later works on the line.
Step-by-step escalation:
- Remove the drain stopper and clear visible hair or debris by hand (wear gloves).
- Use a hair-removal tool or zip-it drain cleaner for shallow clogs.
- Plunge with a cup plunger, covering the overflow opening with a wet rag to build pressure.
- If the clog holds, remove the P-trap: place a bucket under the curved pipe, loosen the slip nuts by hand or with slip-joint pliers, pull the trap free, clean it out, and reseat it hand-tight. Check the gaskets — brittle or cracked gaskets on older piping should be replaced before reassembly.
- For deeper clogs, run a hand snake (drain auger) 3–5 feet into the drain line.
Safer alternatives to chemical cleaners: baking soda followed by white vinegar (let it fizz 15 minutes, then flush with hot water), or an enzymatic drain cleaner used monthly as a preventive measure.
Tools: cup plunger, zip-it tool, slip-joint pliers, bucket, hand snake, gloves, eye protection.
Call a plumber when: multiple drains back up simultaneously, you hear gurgling from other fixtures, or you notice sewage odors — these point to a main-line issue, not a local clog.
How do you fix a running toilet or a clogged toilet?
Most toilet clogs clear with a flange plunger or a closet auger. Running toilets are almost always a flapper or fill-valve problem — both parts cost under $15 and take less than 30 minutes to swap.
Unclogging a toilet:
- Use a flange plunger (the one with the rubber flap that folds out). Insert it into the bowl, create a seal, and push down firmly, then pull up sharply. Repeat 10–15 times.
- If plunging fails, use a closet auger: insert the cable into the bowl, crank clockwise to break up or retrieve the obstruction, then flush.
Fixing a running toilet:
- Remove the tank lid and listen. If water is trickling into the bowl, the flapper is the likely culprit.
- Turn off the supply valve behind the toilet. Flush to empty the tank.
- Unhook the old flapper from the overflow tube ears and disconnect the chain. Snap the new flapper in place and reconnect the chain, leaving about half an inch of slack.
- If the tank still runs after a new flapper, adjust the float arm or replace the fill valve entirely. A standard toilet replacement is a reasonable DIY job for confident homeowners and typically takes 1–2 hours.
Parts list: flange plunger, closet auger, replacement flapper ($5–$12), fill valve ($10–$20), wax ring (only if re-seating the toilet).
Call a pro when:
- Backups recur after clearing.
- You smell sewage or notice multiple fixtures backing up at once.
- The bowl or flange is cracked.
- Flange damage or soft subfloor is visible when you lift the toilet.
Replacing a showerhead or faucet: quick swaps and what to check first
Many showerhead replacements and like-for-like faucet swaps are safe DIY jobs, provided no rough-in changes are needed. The swap itself takes 15–60 minutes; parts run $10–$150 depending on finish and brand.

Shut off the supply, remove the old fixture, clean the threads with a wire brush, wrap two to three layers of plumber’s tape (PTFE) clockwise around the male threads, and hand-thread the new fixture before snugging it with a wrench. Turn the supply back on and check for drips at the connection point and at the base of the fixture.
A few non-obvious checks worth making before you button everything up: verify the new showerhead’s flow restrictor matches your water pressure (low-pressure homes can remove the restrictor; high-pressure homes should keep it), confirm the supply line’s aerator is compatible with the new faucet, and look at the condition of the braided supply lines.
Pro Tip: While the fixture is off, turn the shutoff valve fully open and closed to confirm it still seats properly. A valve that won’t fully close is a liability during any future emergency.
Garbage disposal safety: how to clear a jam and reset the unit
For disposal jams or a unit that hums but won’t spin, always disconnect power before reaching inside. Most jams clear in under 20 minutes with a hex wrench and a pair of tongs.
- Cut the power. Turn off the wall switch and flip the breaker for the disposal circuit. Never skip this step.
- Locate the hex port on the bottom center of the unit. Insert a 1/4-inch hex (Allen) wrench and work it back and forth to free the stuck grinding plate.
- Remove the obstruction. Use tongs or needle-nose pliers to pull out whatever caused the jam. Never use your hand.
- Press the reset button on the bottom of the unit (a small red or black button). It may have popped out during the jam.
- Restore power and run cold water before turning the disposal back on.
For downstream clogs that the disposal itself didn’t cause, the P-trap directly below the unit is the first place to check. Remove it the same way described in the drain-unclogging section above.
Call a pro when: the motor hums but the hex wrench won’t free it, you smell burning, the unit trips the breaker repeatedly, or you see any wiring damage near the unit.
Water heater maintenance: what you can do and when to call for replacement
Routine homeowner maintenance extends tank life and catches problems before they become emergencies. The EPA recommends checking or replacing the anode rod every 3–5 years depending on water quality — it’s an inexpensive task that sacrificially corrodes to protect the tank lining.
| Maintenance Task | Frequency | DIY or Pro? | Safety Note |
|---|---|---|---|
| Flush sediment (drain a few gallons) | Annually | DIY | Water is hot — use caution |
| Test T&P (temperature/pressure) relief valve | Annually | DIY | Have a bucket ready; replace if it leaks after testing |
| Inspect/replace anode rod | Every 3–5 years | DIY (confident) or Pro | Turn off supply and power/gas first |
| Check for rust, corrosion, or pooling water | Monthly visual | DIY | Pooling water = call a pro |
| Full replacement | Per unit age/condition | Licensed pro + permit | Gas venting and code compliance required |
Water heater replacement almost always requires a permit and a licensed contractor in the U.S. Gas connections and venting must meet local code, and an inspection is typically required before the unit goes back into service. Check with your local building department before scheduling the work. For detailed guidance on water heater maintenance, Psvplumbinginc covers the full process.
What to do when a pipe bursts or a major leak starts
Act fast. Every minute of uncontrolled water flow adds to structural damage and mold risk.
- Shut off the main water supply immediately. The main shutoff is usually near the water meter, in the basement, or in a utility closet.
- Open faucets throughout the house to drain remaining pressure from the lines.
- Protect valuables and electronics in the affected area. Move items off the floor and cut power to any outlets near standing water.
- Collect water with buckets and towels to limit floor and subfloor damage.
- Apply a temporary fix only if the leak is accessible and you can stop the flow: a pipe repair clamp with a rubber sleeve can buy time until a plumber arrives. This is a stopgap, not a repair.
- Call emergency plumbing services. If you cannot stop the flow, or if the leak is near electrical panels, gas lines, or structural elements, call immediately.
Keep these on hand: a main shutoff wrench, a pipe repair clamp kit, rubber sleeve patches, buckets, and old towels. Knowing where your zone shutoffs are (under sinks, behind toilets, at the water heater) lets you isolate a problem without cutting supply to the whole house.
For a full walkthrough on fixing leaking pipes, including when a temporary clamp is appropriate versus when to wait for a pro, Psvplumbinginc has a dedicated homeowner guide.
Electrical and structural warnings: never wade into standing water near an active electrical panel. If water has reached structural framing, drywall, or insulation, a restoration assessment is needed in addition to the plumbing repair.
When does U.S. law or practical risk require a licensed plumber?
Major work almost always requires a permit and a licensed contractor. The practical reason isn’t bureaucratic — it’s that inspections catch pressure failures, gas leaks, and backflow risks that visual checks miss.
| Job Type | Permit Typically Required? | Why It Matters |
|---|---|---|
| New rough-in (supply or drain) | Yes | Pressure test and inspection required |
| Water heater replacement | Yes (most jurisdictions) | Gas venting, seismic strapping, code compliance |
| Moving supply or drain lines | Yes | Affects system pressure and drainage slope |
| Opening walls for pipe access | Yes | Inspection before closing wall |
| Gas line work (any) | Yes — licensed contractor required | Safety-critical; explosion/CO risk |
| Like-for-like fixture swap | Usually no | No system change; confirm locally |
| Toilet or drop-in sink swap | Usually no | No rough-in change needed |
Documenting repairs and checking permit records protects resale value and reduces the risk of insurance denial. For a clear explanation of why licensed plumbers are essential for code-sensitive work, Psvplumbinginc outlines the safety and legal rationale in detail.
This article provides general information, not legal or code advice. Permit requirements vary by jurisdiction — confirm current rules with your local building department or a licensed contractor before beginning any major plumbing work.
How do you detect hidden leaks behind walls or under floors?
Hidden leaks are often running for weeks before a homeowner notices. The signs are subtle at first: a water bill that creeps up without explanation, a faint musty smell in a bathroom or utility room, or soft spots in drywall near a supply line.
Start with your water meter. Turn off every fixture and appliance in the house, then check whether the meter’s leak indicator (a small triangle or dial) is still moving. If it is, water is flowing somewhere it shouldn’t be. This is one of the most reliable low-tech detection methods available, and your water meter can confirm a hidden leak before you open a single wall.
Other indicators worth watching: peeling paint or bubbling wallpaper near plumbing walls, unexplained warm spots on a floor above a hot-water line, and mold growth in areas with no obvious moisture source. A professional camera inspection of the main sewer line or a whole-house pressure test can locate hidden problems that visual checks miss entirely.
For leaks confirmed behind walls or under a slab, the repair almost always requires a licensed plumber. Cutting into walls or concrete without knowing exactly where the pipe runs risks making the damage significantly worse.
Key Takeaways
Handling the right plumbing tasks yourself saves money; knowing when to stop and call a licensed pro protects your home, your insurance coverage, and your safety.
| Point | Details |
|---|---|
| DIY-friendly jobs | Faucet washers, drain clearing, flapper replacement, and showerhead swaps are safe for most homeowners with basic tools. |
| Permit triggers | New rough-ins, water heater replacement, gas work, and opening walls typically require a permit and a licensed contractor. |
| Anode rod maintenance | The EPA recommends checking or replacing the anode rod periodically to extend water heater life. |
| Emergency first step | Shut off the main water supply immediately, then open faucets to drain pressure before assessing the damage. |
| Psvplumbinginc | For jobs beyond DIY scope, Psvplumbinginc offers licensed emergency repairs, drain cleaning, water heater service, and preventive maintenance plans. |
Why routine maintenance is the most underrated plumbing decision you’ll make
Most homeowners think about their plumbing only when something breaks. That’s understandable — pipes are invisible, and a system that works quietly tends to stay invisible. But the calls we see most often at Psvplumbinginc aren’t emergencies that came out of nowhere. They’re the result of a slow drip ignored for six months, a water heater that never got flushed, or a supply line that was already showing wear when the fixture was last replaced.
The math is straightforward. A monthly walk-through that takes 15–20 minutes — listening for running toilets, checking under sinks, glancing at the water heater — catches the problems that are cheap to fix before they become the ones that aren’t. Flushing sediment from a water heater annually costs nothing but time. Replacing an anode rod every few years costs under $30. Ignoring both can mean a tank failure that floods a utility room and requires emergency replacement.
The homeowners who call us for the least expensive repairs are almost always the ones doing the simple preventive work consistently. That’s not a coincidence.
Psvplumbinginc is ready when the job calls for a licensed pro
When a plumbing task moves past DIY territory — a pipe that won’t stop leaking, a water heater showing rust or age, a drain that backs up no matter what you try — Psvplumbinginc delivers licensed, insured service with transparent pricing and no guesswork on scope.

We handle emergency pipe repairs, water heater installation and maintenance, professional drain cleaning, sewer line inspections, and full preventive maintenance plans for residential and commercial properties. Whether you need a same-day emergency response or want to schedule a water heater maintenance visit before a small issue becomes a replacement, we make the process straightforward. Our pipe repair workflow guide walks you through exactly what to expect from a service call. Request a free estimate online or call us directly — we’ll confirm availability and give you a clear scope before any work begins.
Useful sources and further reading
- EPA WaterSense — Fix a Leak Week: Water-efficiency guidance and leak-impact data from the U.S. Environmental Protection Agency.
- EPA Home Maintenance (WaterSense): Anode rod replacement intervals and water heater maintenance recommendations.
- Plumbing Maintenance Checklist — Checklistoo: Monthly, seasonal, and annual maintenance tasks with time and cost context.
- Preventive Plumbing Measures — Psvplumbinginc: Homeowner routines and checklists to reduce emergency repairs.
- Complete Plumbing Maintenance Checklist — Psvplumbinginc: Weekly, monthly, and annual checklist for residential plumbing systems.
- Why Licensed Plumbers Are Essential — Psvplumbinginc: Safety and legal rationale for hiring a licensed contractor on code-sensitive work.
Leave a Reply