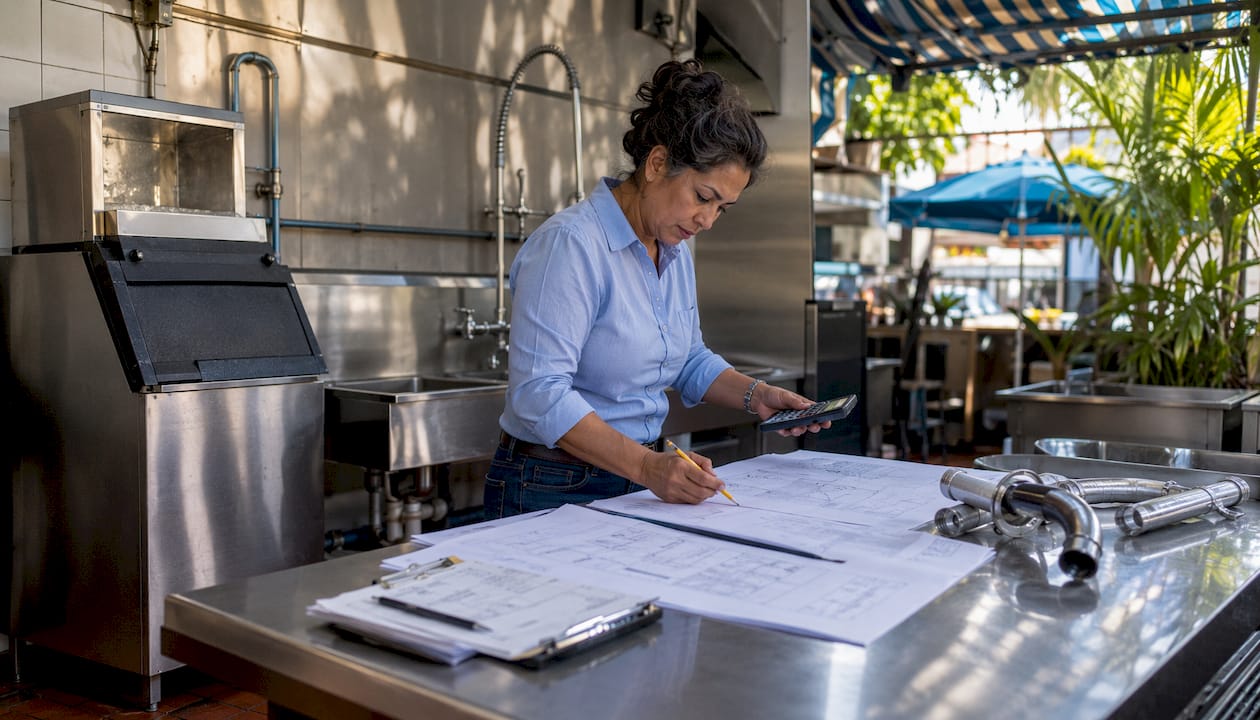
Every commercial kitchen plumbing system must satisfy four non-negotiable requirements before a health department or building inspector signs off: indirect waste connections with proper air gaps for all food-handling fixtures, correctly sized and accessible grease interceptors, backflow prevention on every potable water connection at risk of contamination, and a fully vented drainage system with trap protection throughout. These requirements are not optional enhancements. They are the baseline the International Plumbing Code (IPC) and Uniform Plumbing Code (UPC), as locally adopted, plus NSF International, PDI, and ASME standards demand before you open for service.
Your immediate action sequence looks like this:
- Finalize equipment layout and confirm inlet/outlet locations with each manufacturer before rough-in begins.
- Classify every fixture as indirect or direct discharge and mark air gap locations on construction drawings.
- Size the grease interceptor based on connected fixture flow rates and confirm disposal truck access.
- Size the hot water plant for simultaneous peak demand across dishmachines, prep sinks, and handwash stations.
- Pull a plumbing permit, building permit, and health department plan-review approval before any work starts.
- Engage a licensed, insured plumbing contractor for rough-in, testing, and final inspection sign-off.
Pro Tip: Request a pre-application meeting with your local building and health departments before submitting drawings. Inspectors will tell you exactly which code edition is adopted locally and flag any local amendments that differ from the model code — saving you a costly resubmittal.
Table of Contents
- What are the indirect waste and air-gap rules for food-handling fixtures?
- How do you size and maintain grease interceptors correctly?
- Where are floor drains required, and how must they discharge?
- How should you design sanitary drainage and venting for a commercial kitchen?
- What are the water temperature and hot water sizing requirements?
- What do you need to know about gas supply for kitchen equipment?
- What are the plumbing requirements for specific commercial kitchen fixtures?
- What trap, cleanout, and slope details do inspectors focus on?
- Which piping materials work best in commercial kitchens?
- How does backflow prevention and cross-connection control work in commercial kitchens?
- What permits and inspections does a commercial kitchen plumbing project require?
- What do commercial kitchen plumbing projects typically cost and how long do they take?
- How do you maintain a commercial kitchen plumbing system and avoid common failures?
- How does a licensed contractor implement code-compliant commercial kitchen plumbing?
- Key Takeaways
- The mistakes that cost the most on commercial kitchen projects
- Psvplumbinginc handles commercial kitchen plumbing from design to sign-off
- Primary sources and further reading
What are the indirect waste and air-gap rules for food-handling fixtures?
Indirect waste connections are required for any fixture or piece of equipment that handles food, beverages, or ice. The logic is straightforward: a direct connection between a food-contact fixture and the sanitary sewer creates a potential pathway for wastewater to back up into the fixture. An indirect connection breaks that pathway physically.
Air gap vs. air break: what the difference means for your drawings
An air gap is the unobstructed vertical distance between the lowest point of a water supply outlet (or indirect waste pipe) and the flood-level rim of the receiving fixture. The IPC requires this gap to be at minimum twice the effective opening of the indirect waste pipe. A 1-inch indirect waste pipe, for example, requires a 2-inch air gap above the flood rim of the floor sink or receptor below it.

An air break is a physical separation where the indirect waste pipe discharges below the flood-level rim but does not connect directly to the trap. Air breaks are sometimes permitted for non-food applications, but they are not an acceptable substitute for food-handling fixtures. Prep sinks, two-bay and three-bay sinks, ice machine condensate and drain lines, walk-in refrigerator and freezer floor drains, and dishwasher discharge all require a true air gap.
Minimum air-gap dimensions
| Indirect waste pipe diameter | Minimum air gap (2× effective opening) |
|---|---|
| 1 in | 2 in |
| 1½ in | 3 in |
| 2 in | 4 in |
| 3 in | 6 in |
The receiving receptor (floor sink or open hub) must be large enough to accept the maximum discharge flow without overflowing. A 12-inch-square floor sink is the most common receptor for kitchen indirect waste, but verify the sizing against the combined flow rate of all fixtures discharging into it.
Indirect connection installation checklist
- Floor sink or open-hub receptor is trapped and vented independently.
- Indirect waste pipe terminates above the flood-level rim by the required air-gap dimension.
- Receptor has a removable strainer and is accessible for cleaning.
- Each indirect waste pipe is supported and sloped at a minimum of ¼ inch per foot toward the receptor.
- Air-gap dimensions are dimensioned on the plumbing drawings, not just noted in specifications.
Pro Tip: On your construction drawings, call out the air-gap dimension as a labeled dimension, not just a note. Plan reviewers approve drawings faster when the gap is shown graphically — it removes any ambiguity about compliance and eliminates the most common comment on first submittal.
How do you size and maintain grease interceptors correctly?
Grease management is where most commercial kitchen plumbing projects run into their biggest code and operational problems. Grease interceptors must be sized for the maximum discharge of all connected indirect waste pipes, and they must conform to PDI G 101, ASME A112.14.3 or A112.14.4, and applicable NSF standards.

Grease trap vs. grease interceptor
A grease trap (also called a hydromechanical grease interceptor) is a small, passive device installed under or near a sink. It is typically rated in gallons per minute (GPM) and is appropriate for lower-volume operations or where a large external interceptor is impractical. A grease interceptor is a large, gravity-type unit, often installed underground outside the building or in a utility room, rated in gallons of grease capacity. Most municipal sewer authorities require the larger interceptor for full-service restaurants.
Sizing a grease interceptor: worked example
The PDI G 101 method sizes hydromechanical interceptors by flow rate. For a three-compartment sink with a 24" × 30" × 14" bowl (each compartment), the calculation works as follows:
- Calculate the volume of the largest compartment: 24 × 30 × 14 = 10,080 cubic inches.
- Convert to gallons: 10,080 ÷ 231 = 43.6 gallons.
- Apply a fill factor of 75%: 43.6 × 0.75 = 32.7 gallons.
- Assume a drain-down time of 1 minute: flow rate = 32.7 GPM.
- Apply a grease retention factor (typically 50%): interceptor rating = 32.7 × 0.50 ≈ 16 GPM.
Round up to the next standard interceptor size — in this case, a 20-GPM unit. Add the flow rates of all other connected fixtures (prep sinks, pot wash, mop sink if connected) and size the interceptor for the combined total.
| Fixture | Typical flow rate contribution |
|---|---|
| Three-compartment sink (per bowl) | 15–20 GPM |
| Prep sink (single bowl) | 8–12 GPM |
| Commercial dishwasher (indirect) | 10–15 GPM |
| Pot wash sink | 15–25 GPM |
| Mop sink (if connected to interceptor) | 5–10 GPM |
Placement and access rules
- Interceptors must be accessible for inspection, cleaning, and pump-out by a disposal truck or rendering service.
- Underground interceptors require a manhole or access riser at grade level.
- Locate interceptors downstream of all connected fixtures but upstream of the building sewer connection.
- Do not route toilet or urinal waste through the interceptor.
- Provide a cleanout immediately upstream of the interceptor inlet.
Pro Tip: Coordinate interceptor placement with the civil engineer early. Underground interceptors require excavation, and their location affects the building sewer slope and connection point to the municipal main. A late-stage interceptor relocation is one of the most expensive changes on a kitchen project.
Maintenance schedule
- Weekly: Remove and clean strainer baskets; check grease depth in hydromechanical traps.
- Monthly: Measure grease and solids accumulation; pump out when combined depth reaches 25% of total liquid depth.
- Quarterly: Full pump-out and inspection of baffles and inlet/outlet tees for gravity interceptors.
- Annually: Document pump-out records and submit to the local sewer authority if required.
- Every service visit: Record date, technician, volume removed, and condition of baffles in the maintenance log. Health inspectors will ask for this log.
Where are floor drains required, and how must they discharge?
Floor drains are required in any area where water accumulates during normal operations or cleaning. The specific locations your health department and building inspector will look for include:
- All food preparation areas with wet operations.
- Walk-in cooler and freezer floors (drains here must discharge indirectly via air gap to prevent sewer gas and backflow contamination).
- Dishwashing and pot-washing rooms.
- Mop rooms and janitorial closets.
- Under ice machines and beverage dispensers.
- Adjacent to water heaters and mechanical equipment with pressure-relief valve discharge.
Walk-in refrigerator and freezer floor drains are a frequent inspection failure point. The code requires these drains to discharge indirectly through an air gap because a direct connection would allow sewer gases to enter the refrigerated space and potentially contaminate stored food. An exception exists when the drain is protected by a backwater valve, which may allow an air break instead, but confirm this with your local inspector before specifying it.
Floor sink installation rules
Floor sinks (also called indirect waste receptors) must be sized to accept the maximum simultaneous discharge of all fixtures draining into them without overflowing. A 12-inch-square floor sink handles most single-fixture indirect connections; larger or multi-fixture connections may require a 14-inch or 16-inch unit. Every floor sink must have:
- A removable, cleanable strainer.
- A trap with a trap primer connection if the fixture is used intermittently.
- Adequate clearance around the rim for cleaning and inspection.
- A vent connected to the sanitary vent system.
Trap primer and cleanout requirements
Trap primers are mandatory for floor drains and floor sinks in areas where the fixture is used less than daily. Electronic trap primers (pressure-differential type) are the most reliable in commercial kitchens because they activate whenever water flows elsewhere in the system. Cleanouts must be placed:
- At the base of every vertical stack.
- At every change of direction greater than 45 degrees in horizontal runs.
- At intervals not exceeding 100 feet in horizontal runs.
- At the upstream end of every horizontal branch that is more than 5 feet long.
Drain lines must slope a minimum of ¼ inch per foot toward the receptor or stack. Steeper slopes (½ inch per foot) are acceptable for short runs but can cause solids to separate from liquid in longer runs, leading to buildup.
Pro Tip: Show cleanout locations on your floor plan with a standard plumbing symbol and a note stating the cleanout cover must be flush with the finished floor in food-prep areas. Inspectors and health officials both look for this — a raised cleanout cover in a wet kitchen is a sanitation hazard.
How should you design sanitary drainage and venting for a commercial kitchen?
Venting is where commercial kitchen plumbing drawings most often fail plan review. The constraints are real: equipment walls, exhaust hood penetrations, and tight ceiling plenums leave little room for vertical vent pipes. Getting the layout right from the start saves significant rework.
Trap sizing and trap arm limits
Every fixture trap must be the same size as the fixture drain outlet. A three-compartment sink with 1½-inch drain outlets gets 1½-inch P-traps. Trap arms (the horizontal pipe between the trap outlet and the vent) have maximum length limits under both IPC and UPC:
| Trap size | Maximum trap arm length (IPC) |
|---|---|
| 1¼ in | 5 ft |
| 1½ in | 6 ft |
| 2 in | 8 ft |
| 3 in | 12 ft |
Exceeding these limits creates siphonage risk, which pulls the water seal out of the trap and allows sewer gas into the kitchen. Keep trap arms as short as physically possible, and never run a trap arm horizontally through a wall cavity where it cannot be inspected.
Common venting configurations
Individual venting connects a vent pipe directly from each fixture’s trap arm to the vent stack. It is the most reliable method but uses the most pipe and penetrations. Common venting allows two fixtures on opposite sides of a wall to share a single vent, provided they are at the same level and the vent is sized for both. Wet venting permits a drain pipe to also serve as a vent for an upstream fixture under specific IPC conditions — useful in tight spaces but requires careful sizing.
Layout tips to avoid inspection failures
- Coordinate vent penetrations through the exhaust hood plenum with the mechanical contractor before finalizing the plumbing layout.
- Avoid long horizontal indirect waste runs — keep them under 15 feet and slope them consistently.
- Group fixtures along a common wall to share a single vent stack rather than running multiple stacks through the roof.
- Never locate a vent termination within 10 feet horizontally of a fresh-air intake or operable window.
Pro Tip: Run a preliminary vent-routing sketch before the mechanical drawings are finalized. Discovering a conflict between a vent stack and a supply-air duct during construction costs far more than resolving it on paper.
What are the water temperature and hot water sizing requirements?
Commercial kitchens have specific temperature requirements that are enforced at health inspections, not just during permit review. Getting the hot water system sized correctly from the start prevents the most common commissioning failure: a dishmachine that cannot reach sanitizing temperature during peak service.
Temperature requirements
- Handwashing stations: Hot water must be delivered at a minimum of 100°F (38°C). Most health codes require a mixing valve or thermostatic mixing valve at each handwash sink to prevent scalding while meeting the minimum.
- Food prep sinks: Hot water at 110°F–120°F (43°C–49°C) is typical for effective cleaning.
- Three-compartment warewashing (manual): The sanitizing rinse compartment must reach 171°F (77°C) for heat sanitization, or chemical sanitizers may be used at lower temperatures per the applicable health code.
- Commercial dishmachines (high-temp type): The final sanitizing rinse must reach 180°F (82°C) at the manifold. Low-temp machines use chemical sanitizers and operate at lower water temperatures but require a booster heater to maintain wash-water temperature above 120°F.
Sizing the hot water plant: example calculation
A 150-seat restaurant with a high-temp dishmachine, three-compartment sink, two prep sinks, and four handwash stations might require:
| Fixture | Peak demand (GPH at 140°F) |
|---|---|
| Three-compartment sink | 30 GPH |
| Two prep sinks | 20 GPH |
| Four handwash stations | 12 GPH |
| Total simultaneous demand | 132 GPH |
Size the storage water heater or tankless system to deliver at least 132 gallons per hour at 140°F with a first-hour rating that covers the morning rush. A booster heater on the dishmachine line raises water from 140°F to 180°F at the machine, reducing the load on the main plant.
Pro Tip: During commissioning, measure hot water temperature at the dishmachine manifold with a calibrated thermometer and document the reading. Health inspectors will ask for this record at the first operational inspection, and having it ready demonstrates that the system was properly commissioned.
Thermostatic mixing valves (TMVs) at handwash sinks and a dedicated booster heater for the dishmachine are the standard equipment configuration. For the main plant, commercial storage water heaters with a high first-hour rating are preferred over tankless units in high-demand kitchens because they buffer against simultaneous peak loads. Review the commercial water heater maintenance workflow to keep the system performing at spec after commissioning.
What do you need to know about gas supply for kitchen equipment?
Gas piping in a commercial kitchen is sized by the total connected load in British Thermal Units per hour (BTU/h), converted to cubic feet per hour (CFH) based on the gas type. Natural gas has a heating value of approximately 1,000 BTU per cubic foot; propane is approximately 2,500 BTU per cubic foot. Every appliance’s manufacturer nameplate lists the maximum input rating — use that figure, not a rule-of-thumb estimate.
Sizing and pressure requirements
- Add the maximum input ratings (BTU/h) of all connected appliances.
- Convert to CFH: total BTU/h ÷ 1,000 (natural gas) or ÷ 2,500 (propane).
- Size the gas piping using the applicable fuel-gas code table (NFPA 54 / ANSI Z223.1 for natural gas) based on pipe length and CFH demand.
- Commercial cooking equipment typically requires a supply pressure of 7 inches water column (WC) for natural gas. Confirm with each manufacturer’s installation manual.
Required shutoffs and emergency valves
- A manual shutoff valve must be installed within 6 feet of each appliance, accessible without moving the appliance.
- A master emergency shutoff (often called a “gas pull station” or automatic shutoff) must be located at the kitchen exit, accessible to staff in an emergency.
- Flexible connectors between the rigid gas line and the appliance must be listed for commercial use and must not pass through walls, floors, or ceilings.
- Gas lines must be pressure-tested before concealment, with test results documented for the inspector.
Pro Tip: Coordinate the emergency gas shutoff location with the fire suppression contractor. Many jurisdictions require the hood suppression system to automatically shut off the gas supply to cooking equipment when the system activates. The gas shutoff valve must be compatible with the suppression system’s actuator.
Gas installation safety checklist
- Confirm gas type (natural gas or propane) and supply pressure with the utility before sizing.
- Verify each appliance’s BTU/h input rating from the manufacturer’s nameplate.
- Size all piping per NFPA 54 tables for the pipe material, length, and CFH demand.
- Install a sediment trap (drip leg) at each appliance connection.
- Pressure-test the system at 1.5 times the operating pressure before concealment.
- Document test results and submit to the inspector with the permit package.
- Coordinate automatic gas shutoff with the hood suppression system installer. Review gas line inspection requirements for the full compliance checklist.
What are the plumbing requirements for specific commercial kitchen fixtures?
Commercial kitchens require at least three separate sink stations as a baseline health code requirement: a dedicated handwashing sink, a food prep or washing sink, and a mop or utility sink. Many full-service operations need more. The table below summarizes the typical plumbing requirements for common fixtures.
| Fixture | Connection type | Grease interceptor required? | Typical trap size | Notes |
|---|---|---|---|---|
| Three-compartment sink | Indirect (air gap to floor sink) | Yes | 1½ in per bowl | NSF-certified; 1½ in IPS drains typical |
| Handwash sink | Direct | No | 1¼–1½ in | Hot/cold with TMV; soap and drying provisions required |
| Prep sink | Indirect (air gap) | Yes | 1½ in | Separate from handwash sink |
| Commercial dishmachine | Indirect (air gap) | Yes | Per manufacturer | Booster heater on high-temp machines |
| Ice machine | Indirect (air gap) | No (condensate only) | 1 in | Drain to floor sink; condensate line separate from food drain |
| Mop sink | Direct or indirect | No (check locally) | 2 in | Floor-mounted; hose bib with backflow preventer |
| Walk-in cooler floor drain | Indirect (air gap) | No | 2 in | Air gap to floor sink outside refrigerated space |
| Coffee/espresso machine | Indirect (air gap) | No | 1 in | Backflow preventer on water supply |
Placement and clearance checklist
- Handwash sinks must be located within 25 feet of every food-prep station (confirm exact distance with your local health code).
- A minimum of 18 inches side-to-side and 21 inches front-to-back clearance is required around most plumbing fixtures for service access.
- ADA-compliant handwash sinks in accessible areas must have knee clearance below the sink bowl and insulated supply and drain pipes.
- Dishmachine rough-in locations must match the manufacturer’s inlet/outlet specifications exactly — confirm these from the equipment submittal before rough-in.
Pro Tip: Request the manufacturer’s rough-in sheet for every piece of equipment before the plumbing subcontractor begins work. Drain outlet locations, water inlet sizes, and required clearances vary significantly between brands and models. A rough-in based on a generic assumption almost always requires correction.
What trap, cleanout, and slope details do inspectors focus on?
Inspectors at rough-in and final stages spend significant time on trap installation, cleanout placement, and drain slope. These are the details that most often generate correction notices on otherwise well-designed systems.
Trap primer types and when they are required
Trap primers are mandatory for any floor drain or floor sink that is not used at least once daily. Two types are common in commercial kitchens:
- Pressure-differential (electronic) trap primers: Activate when water pressure drops elsewhere in the system (when any fixture opens). These are the most reliable for commercial use.
- Continuous-flow trap primers: Deliver a small, constant trickle of water to the trap. Simpler but can waste water over time.
Trap seal depth must be maintained between 2 inches and 4 inches. A trap seal shallower than 2 inches is vulnerable to evaporation and siphonage; deeper than 4 inches can allow solids to accumulate.
Cleanout locations and slope requirements
Required cleanout locations include:
- At the base of every drainage stack.
- At every horizontal-to-vertical change of direction.
- At intervals not exceeding 100 feet in horizontal runs.
- At the upstream end of every branch drain longer than 5 feet.
- At the building drain cleanout (typically near the foundation wall or at the property line).
The standard minimum slope for drain lines is ¼ inch per foot (2% grade). This slope produces a self-scouring velocity of approximately 2 feet per second in a 4-inch pipe, which is sufficient to carry solids without buildup. Slopes steeper than ½ inch per foot in larger pipes (4 inches and above) can cause liquids to outrun solids, leading to accumulation.
Pro Tip: Mark every cleanout location on the as-built drawings and photograph each one before the floor is poured or walls are closed. Facilities managers need to know exactly where cleanouts are located for future maintenance — and inspectors may ask for as-built documentation at final.
Which piping materials work best in commercial kitchens?
Material selection for commercial kitchen plumbing is driven by three factors: the fluid being conveyed, the environment the pipe is exposed to, and local code acceptance. Not every material is appropriate for every application.
- Cast iron (hub-and-spigot or no-hub): The preferred material for sanitary drainage in commercial kitchens. Cast iron is durable, noise-dampening, and resistant to the mechanical abuse of a busy kitchen. No-hub cast iron with stainless steel couplings is the most common specification for above-slab drain lines.
- Copper (Type L or Type K): The standard for potable hot and cold water supply lines. Type L is appropriate for most commercial applications; Type K is specified where additional wall thickness is required (underground or high-pressure applications). Copper resists corrosion in potable water systems but should not be used in high-acid or high-chloride environments without protective coatings.
- Stainless steel (Type 304 or 316): Specified for exposed drain piping under sinks, in food-prep areas, and anywhere the pipe is subject to aggressive cleaning chemicals or acidic washdowns. Type 316 offers better chloride resistance than Type 304 and is preferred in coastal or high-chloride environments.
- CPVC: Acceptable for hot and cold water supply in many jurisdictions. Lighter and easier to install than copper, but check local code adoption — some jurisdictions restrict CPVC in commercial occupancies. Not suitable for temperatures above 200°F.
- PEX: Increasingly accepted for water supply in commercial applications. Flexible, freeze-resistant, and easy to route in tight spaces. Confirm local code acceptance and verify that the specific PEX product is listed for commercial use.
| Material | Best application | Key limitation |
|---|---|---|
| Cast iron | Sanitary drainage, stacks | Heavier; requires proper hangers |
| Copper (Type L) | Potable water supply | Cost; avoid high-acid environments |
| Stainless steel (304/316) | Exposed drain, sanitary piping | Higher material cost |
| CPVC | Water supply (check locally) | Temperature limit ~200°F |
| PEX | Water supply, flexible runs | Verify local commercial acceptance |
Pro Tip: Specify no-hub cast iron with stainless steel shielded couplings for all above-slab sanitary drainage. It is the most widely accepted material, produces the least noise transmission in multi-story buildings, and holds up to the thermal cycling and cleaning chemicals common in commercial kitchens.
How does backflow prevention and cross-connection control work in commercial kitchens?
Backflow and cross-connection control are the primary public-health goals of commercial kitchen plumbing regulation. Every connection between the potable water supply and a non-potable source — a chemical dispenser, a boiler, a carbonated beverage system, or a hose bib — is a potential cross-connection. The device required depends on the degree of hazard.
Device categories and applications
- Reduced pressure zone (RPZ) assembly: Required for high-hazard connections where a contaminant could cause illness or death. Typical applications include chemical dispensers, boiler make-up water connections, and connections to non-potable water systems. An RPZ must be installed above grade, accessible for testing, and tested annually by a certified backflow tester.
- Double check valve assembly (DCVA): Appropriate for low-hazard connections where the contaminant is objectionable but not health-threatening. Used on fire sprinkler systems and some irrigation connections. Not acceptable for high-hazard applications.
- Atmospheric vacuum breaker (AVB): Used on hose bibs and mop sink faucets. Simple and inexpensive, but cannot be installed where it may be submerged or where continuous pressure is applied for more than 12 hours.
- Air gap: The most reliable protection for any application. No mechanical parts to fail, no annual testing required. Use an air gap wherever the plumbing layout allows — it is always the preferred solution.
For more background on how these devices protect your water supply, the backflow prevention basics guide covers the fundamentals clearly.
Testing and inspection checklist
- All RPZ assemblies must be tested at initial installation by a certified tester.
- Annual recertification tests are required in most jurisdictions; test reports must be submitted to the water utility.
- DCVAs require annual testing in most jurisdictions.
- Maintain a log of all test dates, results, and tester credentials.
- Replace any device that fails a test immediately — operating with a failed backflow preventer is a code violation and a public health risk.
Pro Tip: Schedule backflow device testing at the same time as your annual grease interceptor inspection. Combining service visits reduces downtime and keeps your compliance records organized in one maintenance cycle.
What permits and inspections does a commercial kitchen plumbing project require?
A commercial kitchen plumbing project typically requires multiple permits and passes through several inspection stages. Missing any one of them can delay your certificate of occupancy or health department approval.
Permit checklist
- Plumbing permit: Required in every jurisdiction for new installation or significant alteration of a plumbing system.
- Building permit: Covers the overall construction scope; the plumbing permit is typically issued under it.
- Health department plan review: Separate from the building permit; the health department reviews equipment layout, sink counts, handwash sink locations, and grease management before approving the kitchen for food service.
- Grease interceptor permit: Many sewer authorities require a separate permit and approval for interceptor installation and connection to the municipal sewer.
- Sewer connection permit: Required when connecting a new building drain to the municipal sewer main.
- Backflow device registration: Some water utilities require registration of all backflow prevention assemblies on their system.
Typical inspection sequence
- Rough-in inspection: Verifies pipe sizing, slope, trap arm lengths, vent connections, and cleanout locations before walls or floors are closed. Pressure tests on water supply and gas lines are typically required at this stage.
- Underground inspection: If any drainage or water supply is installed below the slab, a separate underground inspection is required before the slab is poured.
- Grease interceptor inspection: The sewer authority or building department inspects the interceptor installation before backfill.
- Final plumbing inspection: Verifies fixture installation, backflow device installation, trap primers, and overall system function. Hot water temperature at fixtures is often checked.
- Health department inspection: Separate from the building inspection; verifies sink counts, handwash sink locations, water temperatures, and grease management compliance.
The primary codes to cite on your drawings are the IPC or UPC as locally adopted, NSF/ANSI standards for equipment certification, PDI G 101 for grease interceptor sizing, and ASME A112.14.3 or A112.14.4 for interceptor construction. Using commercial plumbing inspection tools during commissioning helps document compliance before the inspector arrives.
What do commercial kitchen plumbing projects typically cost and how long do they take?
Cost and timeline vary significantly by project scope, local labor rates, existing conditions, and the complexity of the equipment package. The figures below are planning-level estimates; get firm bids from licensed contractors for your specific project.
| Scope item | Approximate cost range | Key variables |
|---|---|---|
| Plumbing rough-in (new construction) | $4–$6 per sq ft | Kitchen complexity, fixture count, local labor rates |
| Grease interceptor (supply & install) | — | Size, underground vs. above-grade, access requirements |
| Commercial hot water plant | — | Capacity, booster heater, fuel type |
| Backflow device installation | — | Device type, accessibility, testing |
| Permit and plan review fees | — | Jurisdiction, project size |
Representative project timeline
- Equipment layout finalization: 2–4 weeks (must precede all plumbing design).
- Plumbing design and permit submittal: 2–4 weeks.
- Permit approval (building + health department): 2–8 weeks depending on jurisdiction.
- Underground rough-in and inspection: 1–2 weeks.
- Above-slab rough-in and inspection: 2–4 weeks.
- Fixture installation and final inspection: 1–2 weeks.
- Health department operational inspection: Scheduled after final plumbing approval.
Total from design start to health department approval: typically 10–20 weeks for a new full-service kitchen. Tenant improvement projects in existing buildings with existing drainage infrastructure can move faster, but plan-review timelines in major metros often add 4–6 weeks.
Primary cost drivers
- Existing drainage conditions (slab penetrations, existing interceptor location).
- Distance from the building drain to the municipal sewer connection.
- Equipment complexity and number of indirect waste connections.
- Gas service additions or upgrades.
- Local plan-review timelines and fee schedules.
How do you maintain a commercial kitchen plumbing system and avoid common failures?
Reactive maintenance in a commercial kitchen is expensive. A grease overflow during service shuts down the kitchen; a failed backflow device can trigger a water utility notice of violation. A structured maintenance program prevents both.
Maintenance schedule
- Daily: Check floor drains for slow drainage; verify trap primers are functioning (water present in floor sink receptors).
- Weekly: Clean strainer baskets in floor sinks and grease traps; check under-sink areas for leaks.
- Monthly: Inspect grease trap for accumulation; measure grease depth and pump out if approaching 25% of liquid depth.
- Quarterly: Full pump-out and baffle inspection for gravity interceptors; test trap primers; inspect backflow devices for visible damage.
- Annually: Certified backflow device testing and recertification; water heater inspection and anode rod replacement; full drain cleaning of all horizontal branch lines.
Common failures and early warning signs
- Grease buildup and overflow: Slow drains in the dishroom or prep area, gurgling sounds, grease visible in floor sinks. Cause: missed pump-out schedule or undersized interceptor.
- Trap siphonage: Sewer odors in the kitchen, especially after heavy use. Cause: trap arm too long, missing vent, or failed trap primer.
- Backflow events: Discolored water at fixtures, pressure fluctuations, or a failed annual backflow test. Cause: failed RPZ or DCVA, or an unprotected cross-connection.
- Low hot water temperature at dishmachine: Sanitizing failures, health inspection violations. Cause: undersized water heater, failed booster heater, or excessive heat loss in supply piping.
Pro Tip: Post a laminated maintenance checklist at each floor sink and grease trap location. Kitchen staff who know what to look for catch early warning signs before they become service calls. A slow drain reported on Monday is a $200 cleaning; the same drain ignored until Friday is a $2,000 emergency call and a lost dinner service.
How does a licensed contractor implement code-compliant commercial kitchen plumbing?
Commercial kitchen plumbing is more complex than residential work because of the variety of specialized equipment, the higher hot-water and drainage demands, and the multiple regulatory bodies involved. A licensed contractor’s workflow must account for all of them.
Contractor implementation workflow
- Site survey: Confirm existing drainage elevations, slab thickness, utility entry points, and available ceiling height for venting.
- Equipment layout validation: Review the kitchen consultant’s equipment schedule against the plumbing drawings; confirm inlet/outlet locations from manufacturer submittals before rough-in begins.
- Coordination packet: Produce a coordination drawing showing all plumbing, mechanical, and fire-suppression penetrations to resolve conflicts before construction.
- Permit filing: Submit plumbing drawings, equipment cut sheets, grease interceptor sizing calculations, and backflow device schedules to the building department and health department simultaneously.
- Rough-in: Install underground drainage first; schedule underground inspection before slab pour. Complete above-slab rough-in and schedule rough-in inspection before walls close.
- Pressure testing: Test water supply at 1.5× operating pressure; test gas lines per NFPA 54; document all results.
- Fixture installation and commissioning: Install fixtures, verify hot water temperatures, test backflow devices, and document all results for the health department file.
- Final inspection: Walk the inspector through the system with the as-built drawings and all test documentation in hand.
Psvplumbinginc brings this structured approach to every commercial kitchen engagement, from initial site survey through final inspection sign-off. Our team coordinates directly with kitchen consultants, mechanical contractors, and fire-suppression installers to resolve conflicts on paper rather than in the field. Licensed, insured, and experienced in the full scope of commercial plumbing services, we document every test result and deliver a complete compliance package with every project.
Pro Tip: When requesting a quote for a commercial kitchen plumbing project, bring the equipment schedule, the kitchen layout drawing, and the local health department’s plan-review checklist to the first meeting. A contractor who reviews all three before quoting will give you a more accurate price and a more realistic timeline.
Key Takeaways
Code-compliant commercial kitchen plumbing requires air gaps on all food-handling fixtures, properly sized and accessible grease interceptors, certified backflow prevention, correct venting and trap protection, and permits from both the building department and health department before any work begins.
| Point | Details |
|---|---|
| Air gaps are mandatory | All food-handling fixtures must discharge indirectly with an air gap of at least twice the effective pipe opening. |
| Size interceptors by flow rate | Use the PDI G 101 method; add flow rates of all connected fixtures and round up to the next standard interceptor size. |
| Permits come first | Pull plumbing, building, health department, and grease interceptor permits before rough-in begins. |
| Hot water sizing matters | Size the hot water plant for simultaneous peak demand; add a booster heater for high-temp dishmachines. |
| Psvplumbinginc delivers compliance | Psvplumbinginc handles design coordination, permit filing, rough-in, interceptor installation, backflow testing, and commissioning for commercial kitchen projects. |
The mistakes that cost the most on commercial kitchen projects
The pattern we see most often on commercial kitchen projects is not a failure of technical knowledge. It is a failure of sequencing. Equipment layouts change after rough-in is complete, and the cost of relocating a drain that is already in the slab is never small. The fix is not complicated: freeze the equipment layout before the plumbing subcontractor mobilizes, and require manufacturer submittals for every piece of equipment before the first pipe is cut.
The second most common problem is an undersized grease interceptor. Operators frequently inherit an interceptor sized for a lighter menu, then expand the kitchen without upsizing the interceptor. The result is a pump-out schedule that cannot keep pace with production, grease overflows, and sewer authority violations. If you are taking over an existing kitchen, the first thing to verify is whether the interceptor capacity matches the current equipment load, not the load from five years ago.
Trap primers are the detail that gets skipped most often on value-engineering rounds. They are inexpensive to install during rough-in and expensive to retrofit after the floor is finished. A floor drain without a functioning trap primer in an intermittently used area will lose its seal within days. The sewer gas that follows is both a health hazard and an immediate health inspection violation.
Three things project managers can apply right now: require a coordination drawing before rough-in begins, make interceptor sizing a design deliverable rather than a contractor decision, and put trap primers on the specification regardless of budget pressure. These three steps eliminate the majority of the rework and inspection failures we see on commercial kitchen projects.
Psvplumbinginc handles commercial kitchen plumbing from design to sign-off
Getting a commercial kitchen plumbing system permitted, inspected, and approved requires more than good pipe work. It requires a contractor who understands the full regulatory picture: IPC/UPC compliance, health department plan review, grease interceptor permitting, backflow device certification, and the coordination between plumbing, mechanical, and fire-suppression trades that determines whether a project finishes on schedule.

Psvplumbinginc provides the complete scope for commercial kitchen projects: design coordination, permit filing, grease interceptor sizing and installation, rough-in, backflow testing, commissioning, and final inspection support. We are licensed and insured, and we deliver a full compliance documentation package with every project so your health department file is complete from day one. Whether you are building a new kitchen, renovating an existing one, or bringing an existing system up to current code, we can help you get it right the first time.
To get started, request a commercial plumbing quote or schedule a site visit. Bring your equipment schedule and kitchen layout, and we will walk through the scope, the permit requirements, and a realistic timeline together.
Primary sources and further reading
The references below are the authoritative documents for commercial kitchen plumbing requirements in the United States. Each covers a distinct part of the regulatory picture.
- IPC Chapter 8 / Indirect Wastes (City of Concord reference): Covers indirect waste requirements, air gap and air break definitions, and waste receptor specifications under IPC-style codes. Start here for Sections 802.1 and 802.2.
- NYS Inspection of Commercial Kitchen Plumbing (John Williams, Jr.): A practitioner-level inspection guide covering air gaps, grease interceptor sizing, backflow prevention, and common inspection failure points. Highly useful for designers and contractors preparing for inspections.
- NY Engineers: Commercial Kitchen Plumbing vs. Conventional Design: Engineering overview of how commercial kitchen systems differ from residential, with emphasis on hot-water demand, drainage complexity, and coordination requirements.
- PDI G 101: The Plumbing and Drainage Institute standard for sizing hydromechanical grease interceptors. Required reference for interceptor sizing calculations submitted to sewer authorities.
- ASME A112.14.3 / A112.14.4: ASME standards for grease interceptor construction and performance. Specify these on drawings to confirm equipment compliance.
- NSF/ANSI standards: NSF certification is required for food-zone equipment and many plumbing fixtures in commercial kitchens. Verify NSF listing for all sinks, faucets, and food-contact equipment.
- NFPA 54 / ANSI Z223.1: The National Fuel Gas Code. Required reference for all gas piping sizing, shutoff requirements, and pressure testing in commercial kitchens.
- Local health department plan-review checklist: Every jurisdiction publishes its own checklist for commercial kitchen plan review. Download it before starting design — it is the single most useful document for avoiding resubmittals.
| Source | What it covers | Best used for |
|---|---|---|
| IPC Chapter 8 | Indirect waste, air gaps, receptors | Drawing notes, plan review |
| PDI G 101 | Grease interceptor sizing | Interceptor selection and permitting |
| ASME A112.14.3 | Interceptor construction standards | Equipment specification |
| NSF/ANSI | Food-zone equipment certification | Fixture and equipment selection |
| NFPA 54 | Gas piping sizing and safety | Gas system design and inspection |
| Local health department checklist | Jurisdiction-specific requirements | Pre-application and plan review |
This article provides general technical information about U.S. commercial kitchen plumbing requirements and is not a substitute for professional engineering advice or review by your local authority having jurisdiction. Confirm all code requirements with your local building department, health department, and a licensed plumbing contractor before finalizing your project design.
Leave a Reply