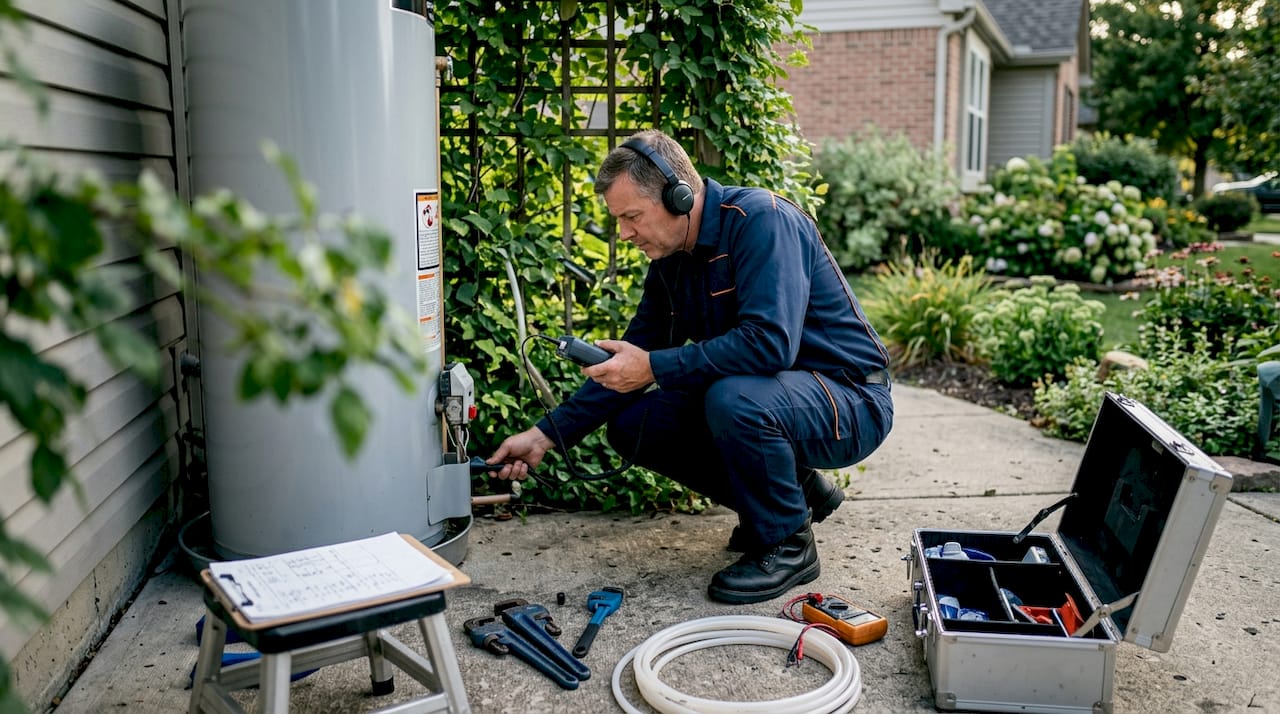
TL;DR:
- Leak detection involves identifying and locating plumbing leaks before visible damage occurs. Professionals use non-destructive methods like acoustic listening, thermal imaging, and tracer gas injection to find hidden leaks accurately. Placing sensors at high-risk, low points, such as under sinks and near water heaters, enhances early warning and water damage prevention.
Leak detection is the systematic process of identifying, locating, and confirming leaks within a plumbing system before visible damage occurs. Professionals use methods like acoustic listening, thermal imaging, and tracer gas injection to find hidden leaks behind walls, under floors, and beneath slabs. Smart sensors from brands like Moen, Phyn, and TP-Link give homeowners a way to monitor their homes continuously. Water damage is the most expensive common insurance claim, averaging over $12,000, which makes early detection one of the most cost-effective investments a homeowner can make.
What is leak detection and how does it work?
Leak detection is a structured diagnostic process that follows four stages: confirming a leak exists, narrowing the affected area, pinpointing the exact location, and validating the repair. It is not simply noticing water loss. Each stage uses different tools and methods depending on the type of leak and the property layout.

Professional plumbers prioritize non-destructive techniques. These methods locate the problem without tearing open walls or digging up floors. That approach protects your home and reduces repair costs significantly.
The goal is always to get precise location data before any physical repair work begins. A plumber who skips the detection phase risks opening the wrong wall or missing a secondary leak entirely. The structured approach to leak detection is what separates a reliable repair from a costly guessing game.

What are the main leak detection methods and technologies?
Common detection methods include acoustic listening, tracer gas injection, thermal imaging, moisture meters, and pressure testing. Each method serves a specific purpose, and professionals often combine two or more to confirm a result.
Here is how each method works in practice:
- Acoustic listening: A technician uses a sensitive microphone or listening rod pressed against pipes or floors to hear the sound of escaping water. This works best on pressurized systems where the leak produces a consistent hiss or drip sound.
- Tracer gas injection: A non-toxic gas mixture is pumped into the pipe. A surface detector then picks up gas escaping through the leak point. This method is highly accurate for underground or slab leaks where sound is muffled.
- Thermal imaging: An infrared camera detects temperature differences caused by moisture. Wet areas behind drywall or under tile show up as cool patches. This method is fast and completely non-invasive.
- Moisture meters: A handheld device measures moisture content in walls, floors, and ceilings. Plumbers use it to confirm wet areas identified by thermal imaging or visual inspection.
- Pressure testing: The system is pressurized and monitored for pressure drops. A drop confirms a leak exists but does not identify its location on its own.
Non-destructive vs. destructive detection
| Method | Destructive? | Best Use Case |
|---|---|---|
| Acoustic listening | No | Pressurized pipe leaks |
| Tracer gas injection | No | Underground or slab leaks |
| Thermal imaging | No | Moisture behind walls or floors |
| Moisture meter | No | Confirming wet areas |
| Pressure testing | No | Confirming leak presence |
| Exploratory demolition | Yes | Last resort when other methods fail |
Non-destructive techniques are the professional standard. Exploratory demolition is a last resort, used only when all other methods fail to locate the source.
Pro Tip: Ask your plumber which detection methods they plan to use before work begins. If the answer is only pressure testing, push for acoustic or thermal imaging as well. Pressure testing confirms a leak exists but cannot tell you where it is.
Where should you place leak sensors for the best early warning?
Sensor placement is the most overlooked factor in home leak detection. Most homeowners place sensors where they can see them easily. The correct approach is to place sensors where water will arrive first, which is usually the lowest point downhill from the leak source.
Water follows gravity. A pipe leaking inside a wall will travel down the stud cavity before it pools on the floor. A sensor placed at the front of a cabinet may miss a leak that pools at the back near the wall.
The five highest-risk placement zones in a home are:
- Under the kitchen sink: Place the sensor at the back of the cabinet, directly beneath the supply lines and drain connection.
- Behind the washing machine: Water supply hoses are a leading cause of sudden flooding. Place a sensor on the floor directly behind the unit.
- Near the water heater: Place a sensor on the floor within six inches of the base. Tank failures often start as slow seeps before they become full ruptures.
- Under bathroom vanities: Supply line connections under sinks fail quietly. A sensor at the back of the cabinet catches slow drips before they soak the subfloor.
- In the basement or crawl space: Place sensors at the lowest point of the floor, especially near floor drains, sump pumps, and any exposed pipe runs.
Smart water leak sensors connected to home security systems can trigger instant alerts and activate automatic shutoff valves. Devices like the Abode Water Leak Sensor integrate directly with smart home platforms to automate the response. That combination of early detection and automatic shutoff is the most effective protection available to homeowners today.
Pro Tip: Place sensors on hard, flat surfaces rather than carpet or uneven tile. Carpet absorbs water and delays sensor contact. A flat surface lets water reach the sensor faster.
Water leak detectors range from simple pooling sensors to advanced flow monitors that measure usage patterns and detect anomalies. Moen’s Flo and Phyn Plus both monitor flow at the main line and can shut off water automatically when they detect unusual activity. Combining a whole-home flow monitor with spot sensors under appliances gives you the most complete coverage.
How does leak detection benefit homeowners and property managers?
Early leak detection protects your property on multiple levels. The financial case alone is strong, but the structural and health benefits are equally significant.
- Prevents water damage: Catching a leak before it spreads stops damage to flooring, drywall, insulation, and structural framing.
- Stops mold growth: Moisture behind walls creates ideal conditions for mold within 24–48 hours. Early detection cuts off the moisture source before mold takes hold. You can read more about the risks in this guide on detecting hidden mold.
- Reduces repair costs: A small pipe repair costs a fraction of what full water damage restoration runs. The average water damage claim exceeds $12,000. Detection equipment costs far less.
- Protects structural integrity: Long-term moisture weakens wood framing, corrodes metal fasteners, and compromises concrete slabs. Catching leaks early prevents that slow deterioration.
- Supports insurance compliance: Many insurers now require documented maintenance and leak prevention measures. Regular plumbing inspections provide that documentation.
- Provides peace of mind: Property managers overseeing multiple units benefit most from continuous monitoring. A single undetected leak in a rental unit can cause damage that takes months and significant money to fix.
What steps should you take when a leak is detected?
A fast, structured response limits damage and makes the repair process smoother. Follow these steps in order:
- Shut off the water supply. Turn off the shutoff valve closest to the leak. If you cannot isolate the source, shut off the main supply to the home. Every minute of flow adds to the damage.
- Isolate the affected area. Move furniture, electronics, and valuables away from the wet zone. Place towels or buckets to contain standing water while you wait for professional help.
- Document the damage. Take photos and video of all visible water, wet surfaces, and any damaged materials. This documentation supports insurance claims and helps your plumber understand the scope of the problem.
- Contact a licensed plumber. A professional will confirm the leak location using detection equipment and assess the full extent of the damage. The pipe repair process starts with verification before any repair work begins.
- Consider automatic shutoff valves. After the repair, ask your plumber about installing a smart shutoff valve. Devices like Moen’s Flo or Phyn Plus can cut water flow automatically when a leak is detected, preventing the same situation from escalating in the future.
Following structured response steps reduces further damage and makes insurance claims easier to process. Homeowners who document and respond quickly consistently see lower total repair costs than those who delay.
Key takeaways
Leak detection is the structured process of confirming, locating, and validating leaks using non-destructive methods to prevent costly water damage and enable precise repairs.
| Point | Details |
|---|---|
| Detection follows four stages | Confirm, narrow the area, locate precisely, then validate the repair. |
| Non-destructive methods come first | Acoustic, thermal, and tracer gas methods locate leaks without opening walls. |
| Sensor placement determines effectiveness | Place sensors at the lowest point downhill from the leak source, not where it is easiest to see. |
| Water damage averages over $12,000 | Early detection costs far less than the average insurance claim for water damage. |
| Response speed limits total damage | Shutting off water immediately and documenting the damage reduces repair costs and supports insurance claims. |
What I’ve learned after years of leak calls
Most homeowners I talk to think leak detection means spotting a wet ceiling or a dripping pipe. That is the end stage of a leak, not the beginning. By the time water is visible, it has usually been traveling through your home’s structure for days or weeks.
The biggest mistake I see is relying on a single method. A pressure test tells you a leak exists. Thermal imaging shows you where moisture has spread. Acoustic listening pinpoints the source. You need all three to get a complete picture. A plumber who uses only one tool is working with incomplete information.
Sensor placement is the other area where homeowners consistently get it wrong. Putting a sensor at the front of a cabinet because it is easy to check defeats the purpose entirely. Water does not pool where it is convenient. It pools where gravity takes it.
The homeowners who come out of a leak situation with the least damage are the ones who invested in a whole-home flow monitor and placed spot sensors correctly. They also had a licensed plumber do a plumbing diagnostic check before problems appeared. Proactive detection is not expensive. Reactive repair is.
— Serghei
Psvplumbinginc leak detection and repair services
When a sensor alerts you or a professional confirms a leak, the next step is a reliable repair. Psvplumbinginc provides licensed, insured leak detection and pipe repair services for homeowners and property managers.

Our team uses non-destructive detection methods to locate leaks accurately before any repair work begins. We document every step, so you have a clear record for insurance or property management purposes. The pipe repair workflow guide on our site walks you through exactly what to expect from first contact to final inspection. If you have noticed signs of a potential leak, check our guide on pipe damage warning signs and contact Psvplumbinginc for a professional assessment.
FAQ
What is leak detection in plumbing?
Leak detection is the diagnostic process used to confirm a leak exists, locate its exact position, and verify the repair was successful. Professionals use non-destructive methods like acoustic listening, thermal imaging, and tracer gas to find leaks without demolition.
How do smart leak detectors work?
Smart leak detectors use moisture sensors to detect water pooling and send instant alerts to your phone. Advanced models like Moen Flo and Phyn Plus monitor water flow at the main line and can shut off water automatically when they detect an anomaly.
Where should I place water leak sensors at home?
Place sensors at the lowest point downhill from potential leak sources, such as under appliances, behind washing machines, and near water heaters. Flat, hard surfaces allow water to reach the sensor faster than carpet or uneven tile.
How much does water damage typically cost?
Water damage is the most expensive common home insurance claim, averaging over $12,000 per incident. Early leak detection and automatic shutoff systems reduce that risk significantly.
When should I call a professional for leak detection?
Call a licensed plumber if you notice unexplained increases in your water bill, damp spots on walls or ceilings, or if a smart sensor triggers an alert you cannot trace to a visible source. Professional detection equipment locates hidden leaks that sensors and visual checks miss.
Leave a Reply